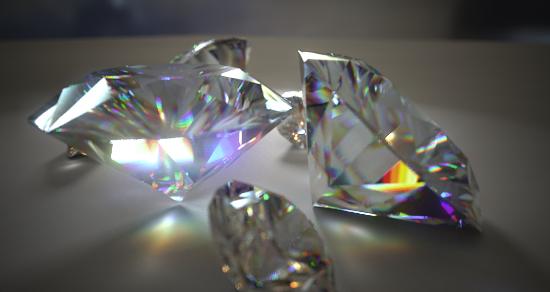
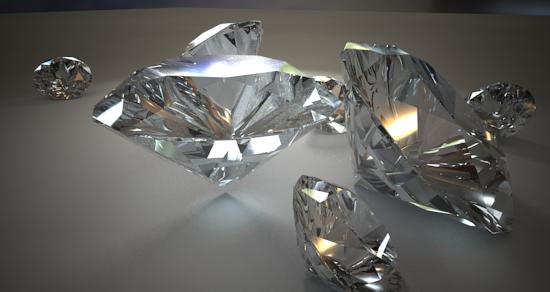
They say Diamonds are a Girls Best Friend, but they can be a poor rendering guys worst nightmare.
One of the reasons is the characteristic property of fine diamonds known in the gem business as "fire" - the nice "pretty colors".
These stem from the fact that Diamond is a material with very high
dispersion. It is also coupled with the fact that the "
cut" of a diamond is specifically made to enhance the "fire" (dispersion) and "brilliance" (ability to reflect light back to the viewer) as much as possible.
But even before we get to the actual dispersion part of things, lets try to see what it takes to render realistic gem's
without it first.
Setting up a scene for Gem rendering
We start with a ridicolously simple 3D model. Since I can't model worth crap, I downloaded a diamond cut according to the classic
"round brilliant" from
here, and made this supercomplex scene:
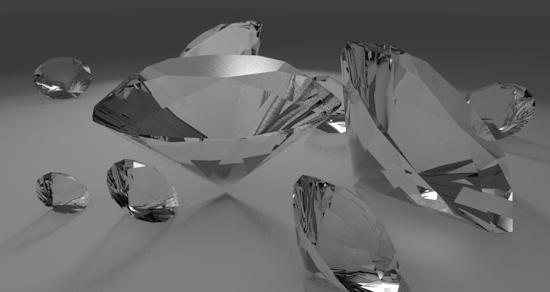
First, make sure you have your gamma correction enabled, diamonds, like all physical things, should be rendered linearily.

Not gamma corrected - ugly |
Gamma corrected - good |
Now we need some decent lighting. We need to follow physics as much as possible. Especially we want to avoid nonphysical "hacks" like specular-only lights, lights without shadows, and other things. We really want to light this in the same way a real photographer would light his scene, with realistic lights with all their realistic effects.
In 3ds Max the easiest way to do this is to use the Photometric lights. This will become especially important later when we get to the caustics, because the Photometric lights automatically gives us the proper photon energy for free. That is a little bit more work to achieve in Maya or Softimage (XSI) because you have to set the photon energy up manually.
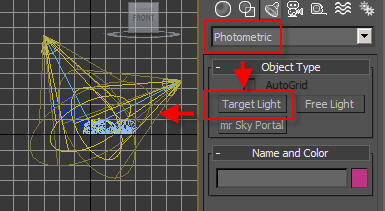
A key point here is that we make them Target Lights (i.e.
spotlights). This is so we get the most efficient distribution of photons. If we didn't give them a direction to shine, our photon emission phase would be much slower because so many photons would get lost in empty space. Make sure you aim the lights where they are needed - this is especially true with caustics.
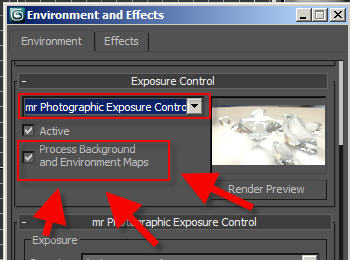
Since we are using photometric lights, this also requires us to use an exposure control. We will be using the
mr Photographic Exposure control, and we need to make sure to check the "Process Environment and Background" checkbox:
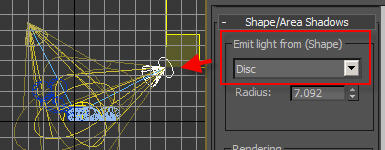
We also want to make sure they are area lights. This gives us the nice soft shadows and "soft" lighting that you would use for an artsy product render like this:
Point lights - hard shadows |
Area lights - soft shadows |
So we enable area lights:
Now these two arealights are not enough, we need indirect light, and to light the scene from the environment as well. To do this we need turn on Final Gathering.
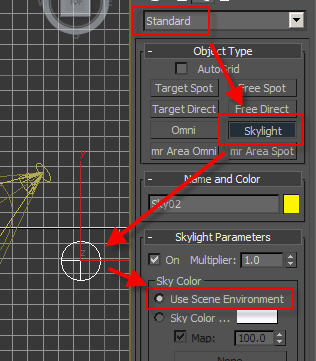
In Maya and Softimage, the very act of doing this will implicitly light the scene from the environment. This doesn't happen in 3ds Max unless we put in a "Skylight". So we add one of those to the scene, and very importantly, set it's option to "Use Scene Environment".
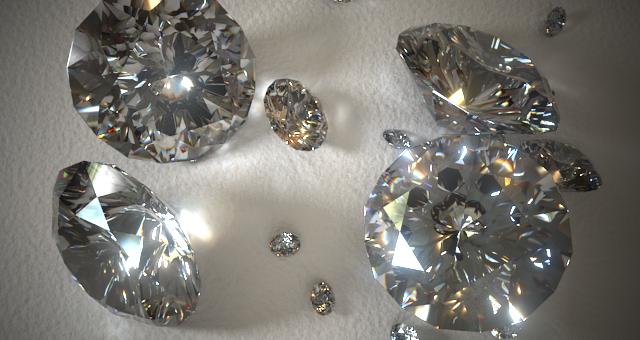
Now we have a little more light:
We are using a default Arch&Design (mia_material) on the gems.
Let us make it more gem-like by a) turning our diffuse to 0.0,
and b) turning our transpacenty to 1.0:
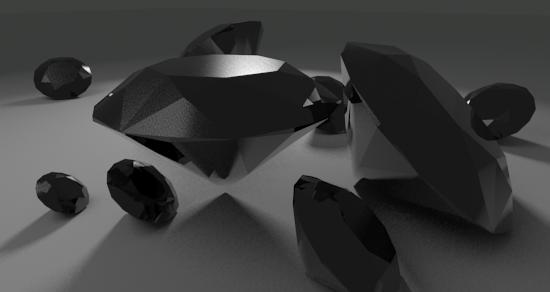
Diffuse = 0.0 |
Transparency = 1.0 |
The automatic energy conservation of Arch&Design (mia_material) already makes this a decent looking transparent looking thing... transparency is complete, but still "overridden" by reflections, and the reflections do depend on angle, just like on real dielectric materials. However, by default it is not basing it on the index of refraction, but a custom curve. We need to fix that by setting it to IOR mode!

This makes our transparency a bit "clearer":
Curve mode |
IOR mode |
The scene is still looking rather dull with the gray background. Diamonds (like
metals) are not so interesting looking in-and-of themselves, but area all about reflections and very very bright "pings" of light. Some people may be tempted to cheat this with a bunch of specular only lights, but why cheat when there is a real reason for such effect - reflections of Bright Things.
And what's the easiest way to get some Bright Things, if not an HDR environment map? Lets slap in some interesting HDR environment map. In 3ds Max you do this by adding a Bitmap to your Environment slot, and make sure to set it to a spherical environment:
(Note: When doing this you may need to play with the Physical Scale to avoid having the environment map render dark, see here)
This should give us something much more interesting to look at. And note how the background lighting changed in tone to match the environment? This is because Final Gathering is picking up the new environment and getting it's lighting from there:
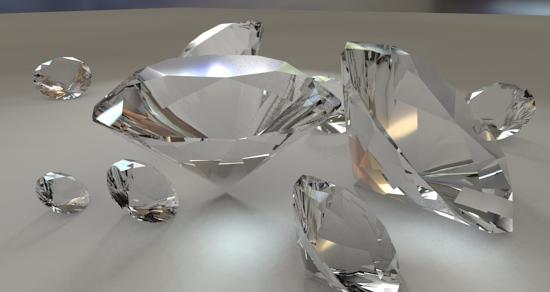
Actually FG is even picking up some of the concentrated bright spots and creating a form of "faux caustics". We will get to real caustics later, but for now it is looking pretty.
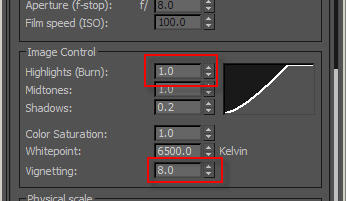
To make our image look nice, we are using the
mr Photographic Exposure control. To make it even nicer we are going to do some modifications.
First, images like this, where we want to focus on some nice center object, always benefit from a bit of vignetting (darkening of edges):
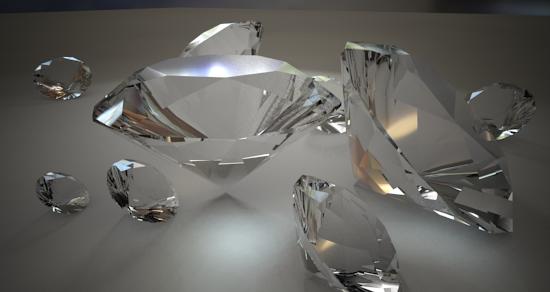
Secondly, since these are diamond renders, and we truly want strong "pings" of light, we should turn up the highlights, to make the really bright bits be really really bright:
These are the knobs we used to do this:
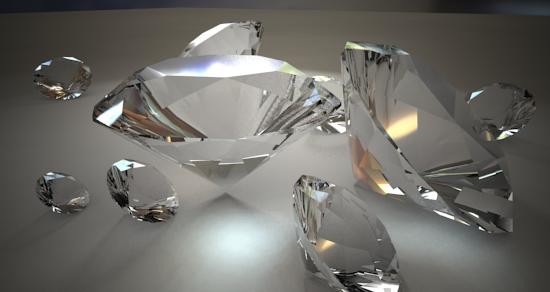
And here comes a final little subtlety. This is really hardly a visible change, but I like it. The model is made with absolutely perfectly sharp edges. And a Jeweller will want to sell you on the idea that his diamond is perfectly flat with totally sharp edges.
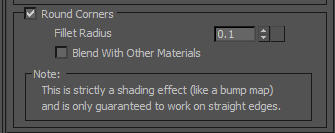
But reality have no such thing as 100% sharp edges, so I love to throw in a teeny bit of edge rounding, which will make edges catch "glints" and look more realistic. Cue the mental ray render time round corners shader thingy, and you will get...

...this. Yeah, not such a big difference, I know. It does more on other shaped Gem's than the
round Brilliant cut, though, so I still suggest you use it.
Taking a shortcut
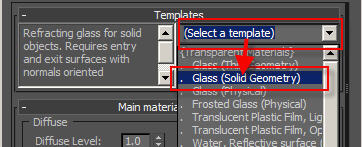
Another way to quickly get to the place we are now with the material, and be certain that all the settings make sense, is to base it on the Physical Glass preset. All we need to do is to load the preset, and set enable the corner rounding feature (which is off in this preset), to get a very quick and decent result:
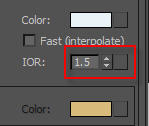
However, we are using the default index of refraction of glass, which is 1.5.
The IOR of diamond is 2.42 - so let's change that:
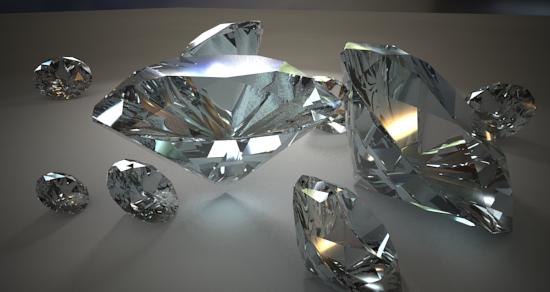
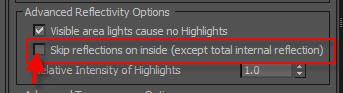
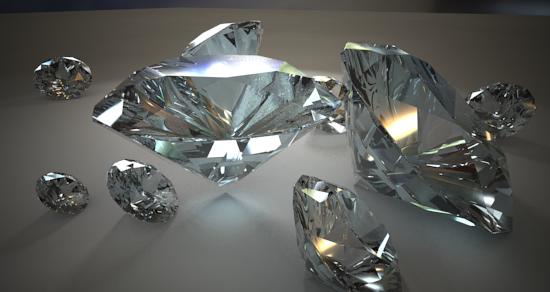
To really make sure we get every single nice "glint" and "ping" of the material, we will disable a speed optimization in the material intended to skip "unnecessary" reflections on the inside of glass objects, which tend to be very weak. But we don't want to loose
any light, so we turn that feature off.
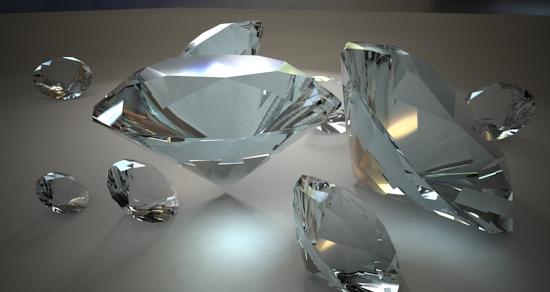
Color Gems
Now these gems look a tad blue. This is because the "Physical Glass" preset introduces some blue. Before we go further with the diamonds, lets discussed coloring our gems for a moment.
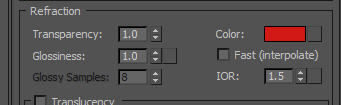
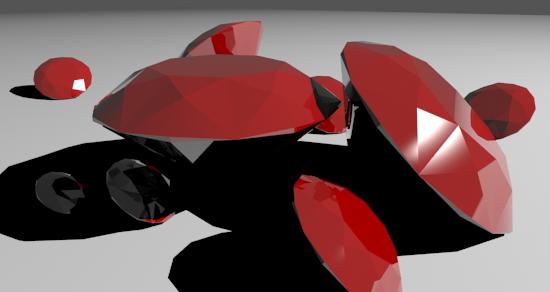
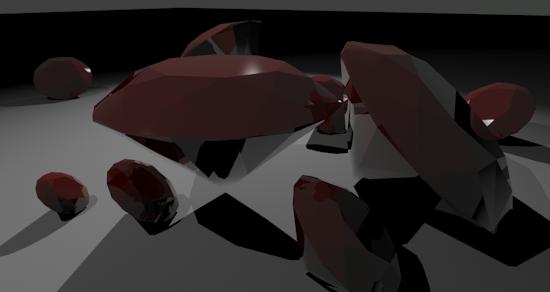
The quick and "obvious" way is to reach for the transparency color swatch, and set this to a color. While this gives something (which can look pretty nice), it is not physically accurate:
This is because it modifies the color of the ray "at the surface" of the object, whereas real colored transparent object modify the color of the ray
gradually as it travels through the medium.
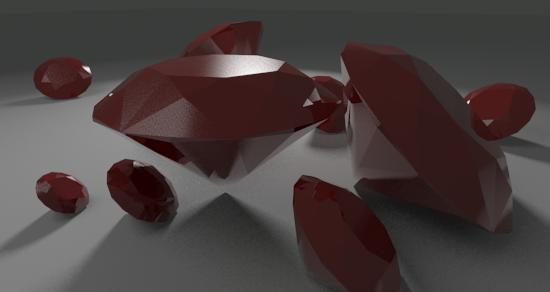
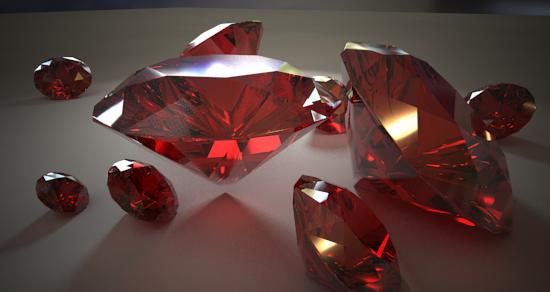
Looking at the gems above (rubies, perhaps?), the small ones are just as deeply red as the big one, and the tip of the big one is just as deeply red as the thickest part of it. That doesn't look... correct.
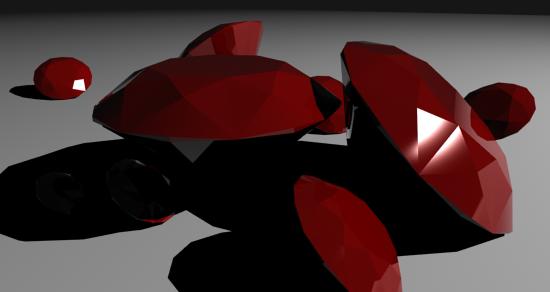
What we need to do is to enable attenuation
through the medium instead. To do this we need to set our transparency color back to white (basically, treat the surface itself as completely transparent), and move to the falloff settings
within the material:
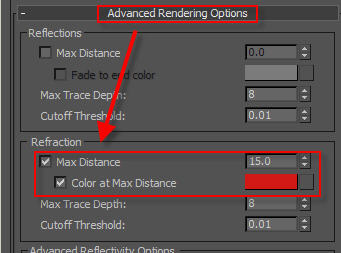
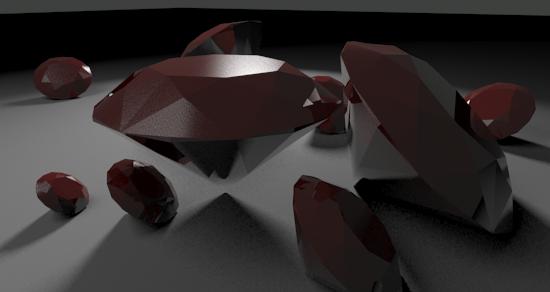
We can use the same color as before, but we just have to set up a distance; at how thick a piece of material would you expect to see that color? Thinner than this will be less colored, thicker will be more deeply colored.
NOTE: It is important that this color has no component of 100%, and no component of 0%. If you were to set it to 1,0,0 red, it would be just as bad as the nonphysical setting. A better "red" would be something like 0.9,0.1,0.1, meaning, it lets through a lot (but not all) red, and very little (but
not zero) of the other colors.
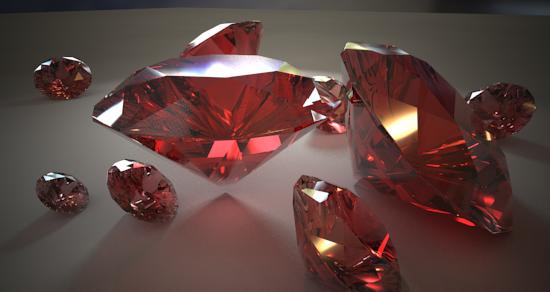
Here is our result:
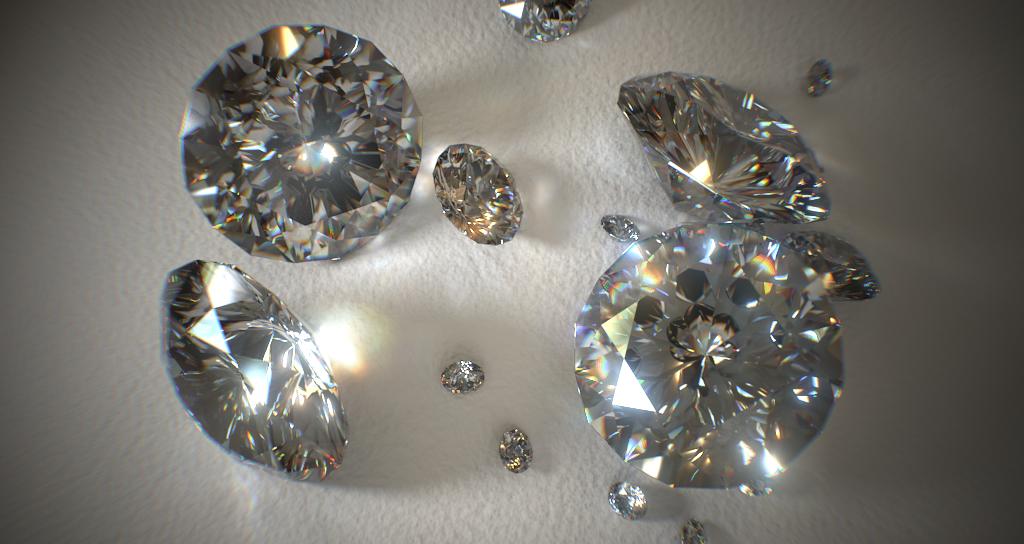
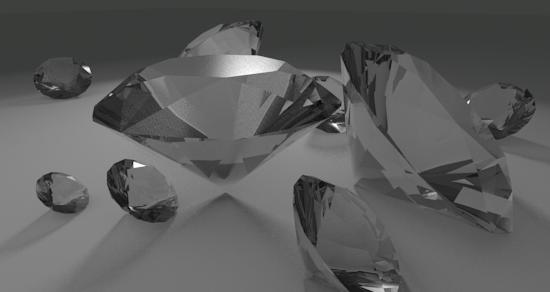
But ideal diamonds are pretty much completely transparent, so for our excercise we will turn this falloff inside the mateial off completely! Uncheck the "Max Distance" and get:
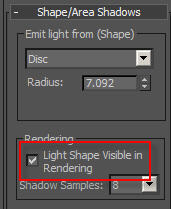
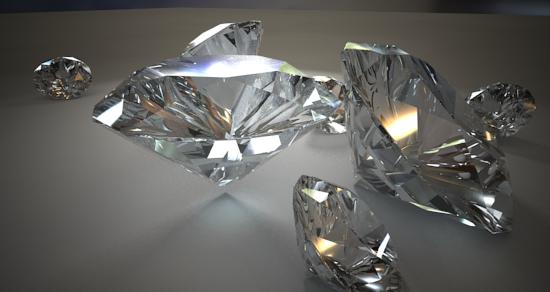
We are getting somewhere. One further thing to ensure the largest amount of nice shiny "pings" in our material is to set our area lights to be "visible". Because most glints in a diamond
is a reflection of an actual light. Turning this option on will render the area lights as superbright surfaces, that will then be seen refracted through our diamonds.
Caustics
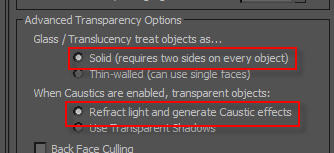
Finally, it is time for those elusive Caustic effects. First we must make sure the material is set up to actually
do caustics, since Arch&Design (mia_material) has an explicit option to NOT do that. If we used the "Physical Glass" preset, this will already be set up for us, but lets make sure:
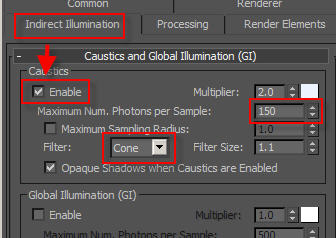
Also we must make sure that caustics are turned on in the render itself. To get nicer "sharp" caustics, I tend to lower the number of photons per sample, and set the filter to "cone".
Generally, the Multiplier should always be 1.0, but we can allow ourselves some artistic licence here and turn it up a tad. But in general, since we are using the photometric lights, we should be getting the physically correct caustic brightness out-of-the-box. If they seem to weak, its probably beacuse people intuition of how bright they "should" be tend to be very overestimated.
We get this image:
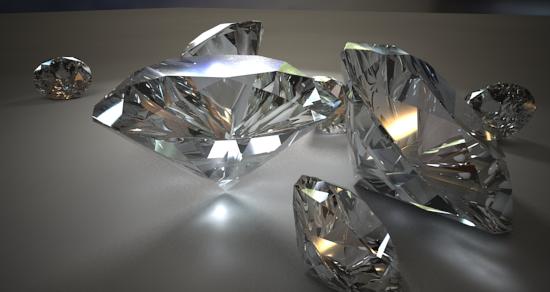
Notice how the shadows actually became
darker? This is because they were previously faked by simply attenuating the light a little bit, bit now the light is properly concentrated in the caustic effect instead. So this is correct.
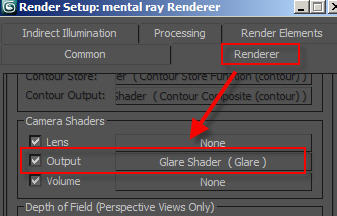
A final touch on this image is to apply some
glare.
Both real world cameras and human eyes perceive a "glow" around superbright objects, partially due to scattering in the atmostphere, but actually much more due to scattering in the light path (lenses) and the imaging surface itself (the film, the CCD, or our retina).
When adding the "Glare" output shader, we get the following image:
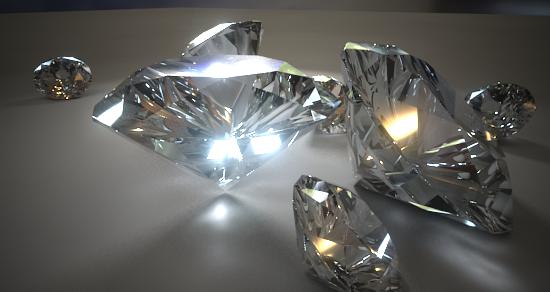
Notice how it
looks much brighter without actually being any brighter at all. That's psycho-optics at work. A white pixel just looks white. A white pixel with a
glow around it, and you'll be reaching for your sunglasses.... :)
And now - finally - time for Dispersion
Dispersion is when different wavelengths refract differently. I guess the most obvious case of this is a rainbow.
Real sunlight is a spectra containing basically an infinite number of wavelengths at once, and each of the different wavelengths will refract slightly differently... i.e. when a sunray hits a surface, one would (in principle) need to trace an infinite amount of rays around the scene to get the "real" effect.
Computers aren't very fond of doing an infinite number of things - at least not if you want them to ever finish. So there are several ways to simulate this w. various techniques.
The technique we will be using here is a very low-tech one - we simply render the scene multiple times with slightly different IOR's, colorize each of the renderings based roughly on the "color" of that wavelength, and combine the result. Et voila, we have a dispersive render.
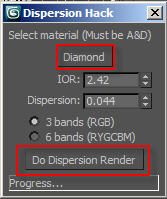
To aid in this I slapped together a
little piece of maxscript. Go to your Maxscript menu and choose "Run Script". A small dialog will pop up with some options.
Simply put, the script will render your image multiple times, while modifying the IOR of your material. But to do this, it needs to know what "your material" is.
It tries to be clever and find any material named "Diamond", but if it doesn't find it, you will have to click the "pick material" button, and choose the material from the scene that you are using (in Instance mode).
Then you need to set the IOR you want it to use, and how the amount of "dispersion". In gemology "dispersion" is pretty much defined as the change in IOR across the visible spectrum, so I tried to mimic this in the script, but it's a bit hacky and probably not accurate at all, so take it for what it is.
When you are done setting up, you can hit the "Do Dispersion Render" button.
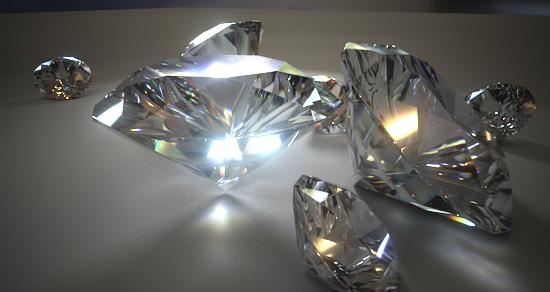
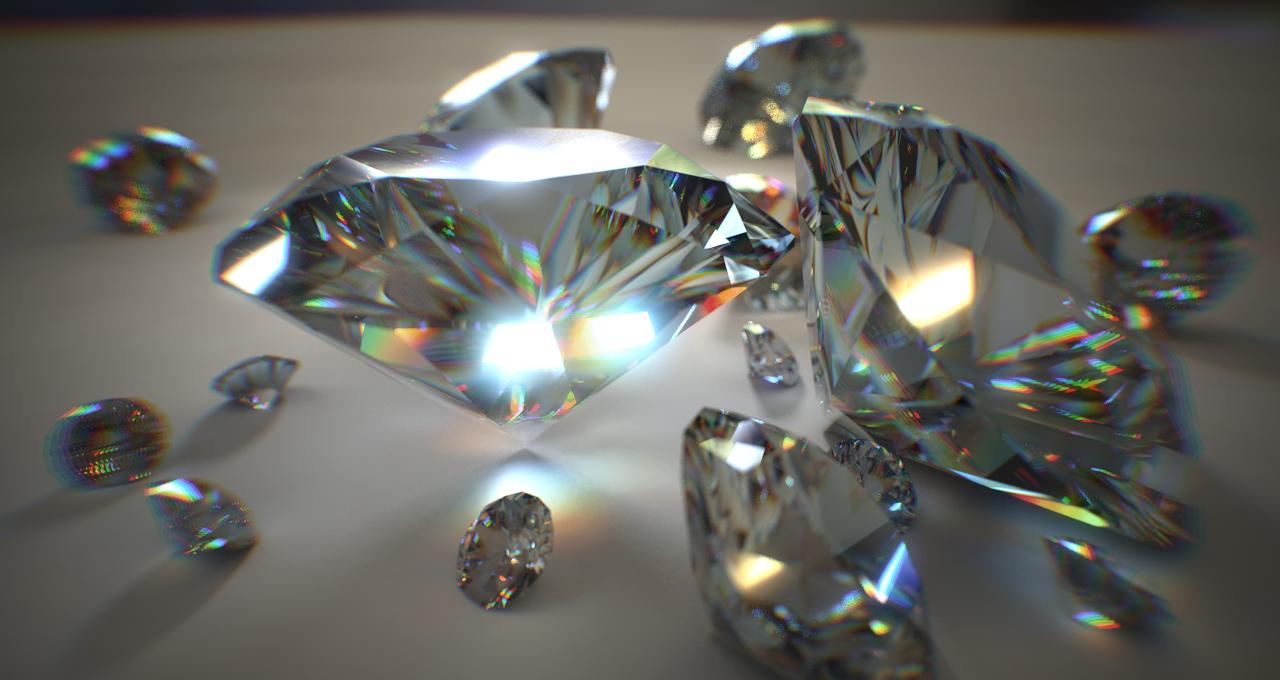
(Note: The script does not save the image, you will need to do that yourself from the image window)The "3 bands" mode does three renders, one each for red, green and blue, and looks like this:

The "6 bands" mode does six renders, for red, yellow, green, cyan, blue and magenta, and is a more subtle effect, but more likely to yeild a "nicer" looking rainbow effect:
And as a final
pièce de résistance, we can enabled depth of field on the camera.
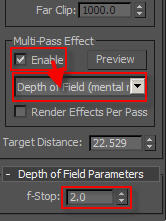
In 3ds Max, this is done by using a 'multi pass render effect' on the camera. This is a bit of a misnomer because it isn't really a "multi pass" effect at all, but it re-uses the UI concept of other 3ds Max "multi pass" effects, so that's where you'll find it. Sorry, it wasn't me who put it there :)
You simply set the f-stop of the camera, and you will get the physically correct depth of field
assuming that
- your scene units are properly set up, AND
- your Aperture Width (in the render dialog) makes sense.
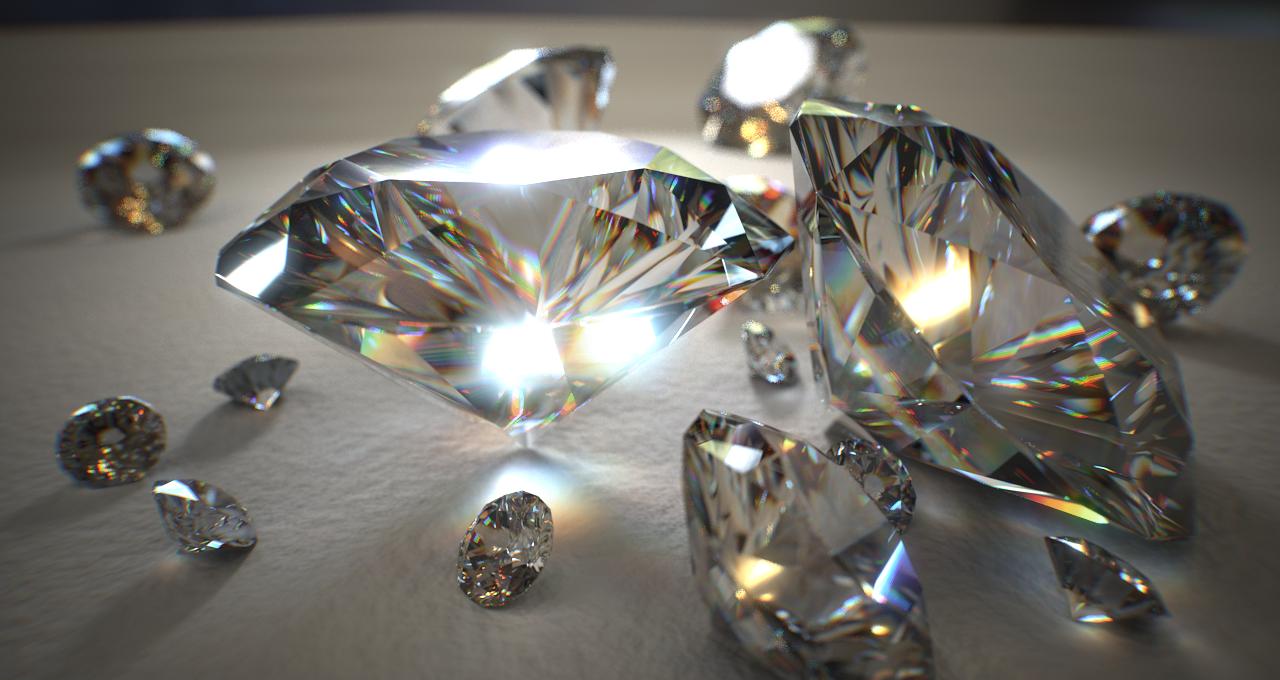
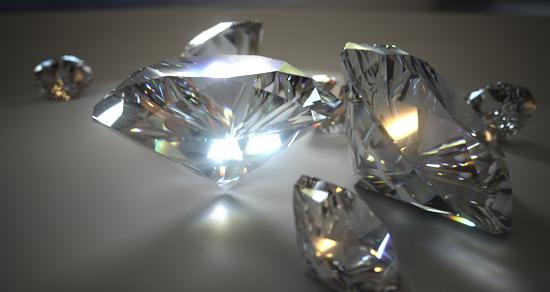
That will give you this "ultimate" render - and we are pretty much done:
Of course, we can exaggerate the dispersion effect for arts sake (simply turn up "Dispersion" a bit):
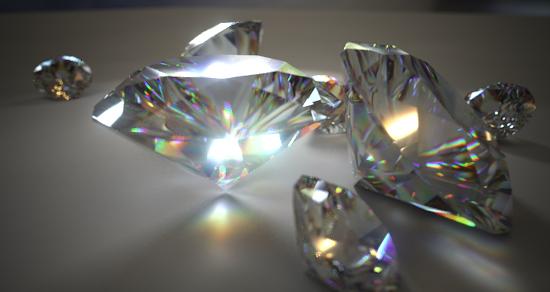
Finally, the script also supports a somewhat hacky "chromatic abberation" mode, where it introduces the Lume "Distortion" lens shader, and modifies the pincushion/barrel distortion slightly for each of the colored renders, if you want to go really Crazee. This is one result of that:
Hope this was helpful.
Unfortunately, you can't cash these diamonds in a bank, nor sell them on eBay...
/Z