OK, I don't have time for an extravagant essay right now, but what I did do is to put a set of examples online.
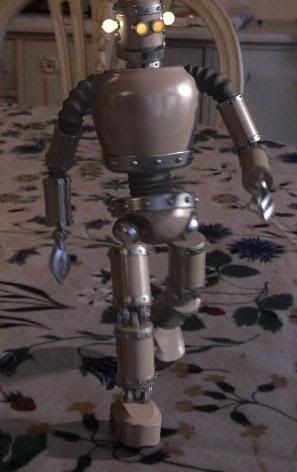
The example uses some geometry (in some cases, our friend "Robo" pictured here on the right) and shows how to use this together with the production shaders, both to introduce our geometry into various backgrounds, as well as using features like the motion blur and motion vector code.
General Overview
The Production library does a lot of things, but one of it's specialties is to help us to integrate a CG object into a photographic background, with the help of a photo of the background and a photo of a mirror ball taken at the same location in the same camera angle as the background photo. So, to play with that, we need a set of backgrounds, with matching mirror ball photos.
As luck would have it, I happen to have just that. (Amazing, innit?) ;)
These backgrounds are available in this backgrounds.zip file. Please download that and unzip before downloading any of the demos scenes (I also apologize for not having time to put Robo into any of the Maya scenes, but he was out at a party the day I made those file and didn't come home until late....)
In a hurry?
If you don't want to read, but play play play, you can go directly to this directory and you will find the files.
Examples for 3ds Max 2008
The 3ds Max demo scenes are sort of "all in one" demos, demonstrating a scene using the mip_matteshadow, mip_rayswitch_environment, mip_cameramap and mip_mirrorball to put a CG object into a real background as described in the PDF docs.

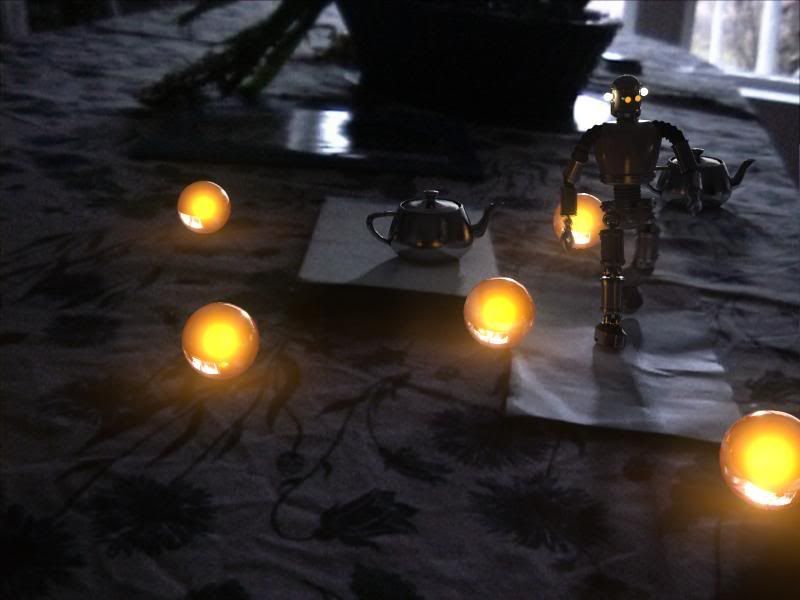
The file robot-1.max puts Robo in my back yard, robot-2.max puts him on my dining room table, robot-3.max on a window ledge, robot-4.max out in a gravel pit (how absolutely charming place to hang out) and finally robot-5.max on my dining room table but at night, and some alien globules has landed...
They all work pretty much the same, i.e. the same settings only swapping in different backgrounds and mirror ball photos from the backgrounds.zip file.
The exception is the file robot-4-alpha.max which demonstrates how to do the same as robot-4.max does, but set up for external compositing (see more details below in the Maya section).
Examples for Maya 2008
The examples for Maya are more "single task" examples, and demonstrates one thing at a time.
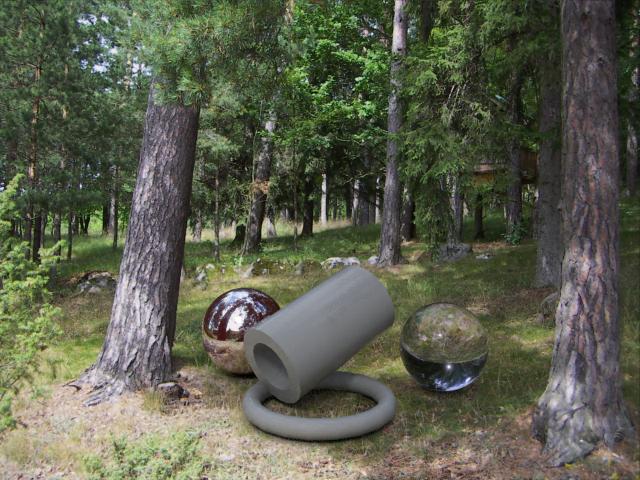
mip_matteshadow1.ma and mip_matteshadow2.ma both demonstrate how to put a set of CG objects into a real background, using the exact same techniques as for 3ds Max above:

The file mip_matteshadow2b.ma demonstrate the same scene as mip_matteshadow2 but set up for external compositing (what is called "Best of Both Worlds" in the manual).
To recap from the manual briefly: In the normal mode (when you composite directly in the rendering and get a final picture including the background right out of the renderer, you use mip_cameramap in the background slot of your mip_matteshadow material, and in your global environment (in the Camera in Maya, in the "Environment" dialog in 3ds Max) you put in a mip_rayswitch_environment, which is being fed the same mip_cameramap into it's background slot, but into it's environment slot it is being fed a mip_mirrorball.
To do the "Best of Both Worlds" mode (to get proper alpha for external compositing, and not see the background photo in the rendering - but yet see its effects, its bounce light, its lighting, its reflections, etc. - one need to do a couple of changes from the above setup:
- In the global Environment should still be a mip_rayswitch_environment as before, the only difference is that instead of putting mip_cameramap into it's background slot, you put transparent black (0 0 0 0).
The trick in Maya is that you cannot put an alpha value into a color slot. We can cheat this by using the mib_color_alpha from the base shaders, and set its multiplier to 0.0. - In the background slot of your mip_matteshadow you used to have a mip_cameramap with your background. What you do instead, is to put in another mip_rayswitch_environment, and into it's environment slot (important, yes, the environment and NOT the background!) you put back the mip_cameramap with your background photo, and in it's background slot you again put transparent black (using same trick as above).
Having done this (as is already is set up in the mip_matteshadow2b.ma example) you will get this rendering:

This image contains all the reflections of the forest, the bounce light from the forest, the reflection of the environment from the mirror ball... but doesn't actually contain the background itself.
However, it has an alpha channel that looks like this...

...which as you see contains all the shadows. So compositing this image directly on top of the background in a compositing application, will give you the same result as the full image above, except with greater control of color balance etc. in post.
Maya in Motion
There is three further example files for Maya:
mip_motionblur.ma, which demonstrates the motion blur, and mip_motionvector.ma and mip_motionvector2.ma who both demonstrate how to output motion vectors.
I know these are rudimentary examples, but the day only has 48 hours... ;)
To quote the Governator: "I'll be bak".
/Z
28 comments:
Hi,
Thanx for creating these examples (and for the blog in general), but I don't understand the examples scenes..
In the scene called 'mip_motionvector.ma' it renders with visible motion vectors, but in the hypershade there are no motionvector shaders attached to the objects(I have unhidden the prod.shaders). How do you do it? I can see that you have changed the default mb settings, but that alone doesn't enable visible motionvectors.
Help?
Yes, thank you for all your work. I got another question.
For me everything works nice but I cant get that nice shadow alpha you show in your tests. I get clear objects alpha without shadow included.
In normal render you can see shadows renderd in nice.
Any idea?
Thanks
Hi, i´ve been playing around with your examples and am very impressed. But i found 2 problems with maya 2008, trying to use the production library "in production":
1. mib_motionblur: renders great and fast but the moment the object leaves the render area maya keeps crashing...
2. mip_matteshadow: checked Ao_on, tried to alter the AoDistance. with every value different from 1 the occlusion shadow completely disappears...
Are these known bugs? any idea ?
In your Robot-1.max scene I've noticed that the EV value is '0.0' in the the mr Photographic Exposure Control. I cannot replicate the same Photographic Exposure values in my scene as the EV value changes with the Photographic Exposure values I type in.
Any ideas as to why this is happening? Is it because I am using Max 2009?
Regards
Same issue as ingsoc75 here.. Can't replicate the same effect! I was studying the files in order to understand how do you get the background untouched by the exposure.. Can you explain this please? Thanks in advance!
Greetings,
I've got through these examples in 2009, and they work fine, but when I replicate them from scratch it doesn't seem to work.
How would one go about doing this in 2009 instead?
Hi Zap,
Thank you for your great examples. I got this working very nicely in Maya 2009 to create some nice icons that can be placed on any background with great results.
The only thing that I am struggling with right now is how to make a part of the object transparent so that the transparency is rendered to alpha and so that it catches reflections but does not show the background or environment behind the object. The object I am working with is a TV where I wish to be able to put different images in the screen in post.
Any suggestions will be greatly appreciated!
Lasse
For doing it in Maya 2009 you need to stay away from the mip_matteshadow_mtl and be sure to use the mip_matteshadow instead.
At least that kinda worked for me.
I'm playing around with tone-mapping and mip_matteshadow.
How would I go about having the background component (eg mip_cameramap + plate shot) not tonemaped along with the rest of the scene.
My thinking is that my plate is shot and tone-mapped by photo camera to 8 bit already so I don't want to re-tone-map by using mia_exposure that is applied to cg elements...or am I being foolish and still don't understand the linear thing?
hello please help me any of u..
i want put a .avi motion file in background instead of background image file and i want production shader of that for using it in camera
macthing.. please help me...
i tried the tips of produstion shader tutorial . but it helps in still background image but i want running or motion background .. please help me
I don't understand how to do this using a HDR spherical map instead of an LDR mirror ball image, when I try the reflection levels are crushed and the orientation doesn't match up to the backgrounds properly, if anyone knows a way please help me out here :)
i couldn't get motionvectors2.ma to work with 2009..the userbuffer woudnt write out the vectors to an exr, so been having to use the other approach of having the output shader take over the primary frame buffer and works fine. Must be the addition of passes in 2009. Tried using that Fb01 to circumvent passes but still no luck. oh well, still nice result in NUKE and no plugins needed :)
And not to mention you got motion vector passes right out of maya native render passes. I think 2 of them. One is normalized vector pass (can be used with plugins like revision Moblur pro) and the other I think is raw mo vectors but It all gets clean out of mental ray and even in to exr without any special network shader setup.
Hi Master Zap,
Thanks for your time and inspiring work.
I have 2 questions: (1) Does the 3ds max Education version ship with the mr production shaders?
(2) if yes, how do you unhide them.
This because they all appear grayed out in Material Editor.
Thanks
I am using 3ds max 2010 (as part of the Education Suite).
Thanks.
Hi Master Zap,
Please ignore my earlier postings.
I have found the production shaders. Couldn't see them because mr wasn't the chosen renderer (the woes of a newbie..).
Thanks all the same.
I am not able to get Use bg shader work in maya mental ray.
Hi Master Zap,
Thanks for the examples. They're awesome!
But, I too am having trouble with the 3ds MAX mr exposure control. In your files the EV is set to 0.0, and the photographic exposure is set to the default settings of Shutter 125, f-stop 16, iso 100.
At this point the file renders perfectly. If I was to shift the shutter speed by any amount then the EV values snap into existence.
At this point the file renders black.
I found that if I set the shutter speed to 0.004, then I can replicate the same intensity of light.
If I was to re-create this technique in a new file then it wouldn't work as I cannot set this EV setting to 0.0 while the shutter speed is 125.
Is there something I'm missing? Is the EV value hard coded to 0?
I'm using max 2010.
Any help would be appreciated. Thanks in advance.
hello sir,
I have used mip_cameramap shader and
I have problem regarding to image placement in camera.
i want to keep it as a Fill without distracting my BG image.
but if i do such a thing. my Base plane get Distracted projection over it.
is there any solution for this kind of problem ?
Thank you. :)
Can i use these shaders with contribution maps for deeper compositing pourpuses?
Hi, i need a mental ray matte material that catches the shadows from one object, but doesn't cast shadows it's self, say as though you have something on a table, but the shot shows under the table as well, where another 3d object is.
The problem I have had is that I don't want the cg matte table to cast a shadow on the matte floor, and the only way to do this is by turning off the shadows in the object properties. but this casts a shadow of the first cg object through the matte table onto the matte floor. is there any way around this?
Hi,
is there any way to get mip_motionblur on a renderpass like beauty or custom_color?
dog names
dog names
dog names
dog names
dog names
dog names
holomaster
holomaster
holomaster
holomaster
หนังใหม่ดูหนังออนไลน์ฟรี สนุกง่ายๆได้ที่บ้าน ดู A Star Is Born (2018) Special Encore Edition [ บรรยายไทย ] และอื่นๆอีกมากมาย
https://www.doonung1234.com/
Wow, the technology is really cool. If you like watching movies, don't forget to come to my website.
ดูหนังออนไลน์
Post a Comment